5 Tools to Detect Digitally Altered Images
If you are doing an OSINT investigation or verification of information you will probably come across a situation where you need to determine if an image has been altered. Often this happens with official government images like those coming from the White House, or foreign countries like North Korea, Iran, and Russia. This can be an important step in discrediting harmful organizations and confronting the growing disinformation campaigns on social media. Below, I have listed a few useful tools and how to use them for analyzing digital photos for alterations.
1. Reverse Image Search
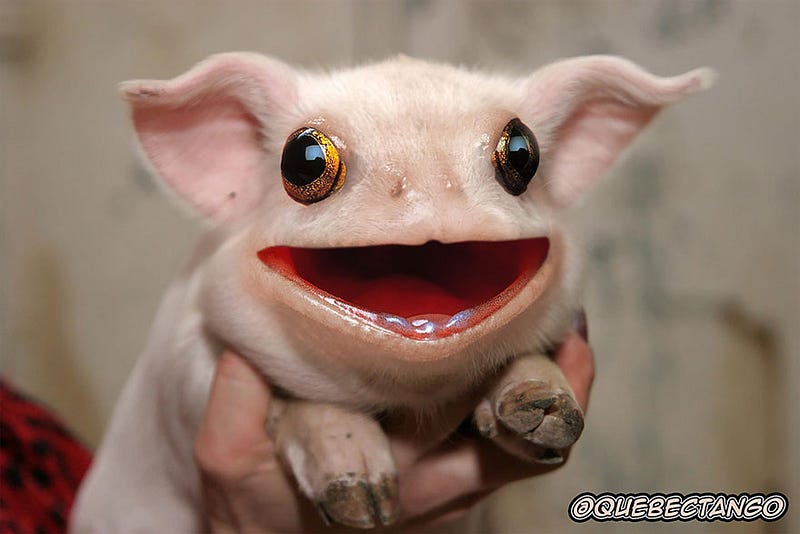
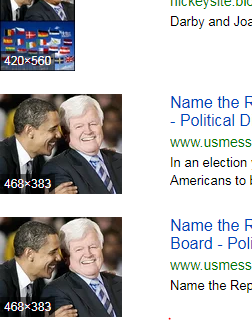
Reverse image search seems like an easy tool to use and you might be wondering why I bothered to include it. When I was starting to learn verification however, I had no clue how to perform a proper reverse image search. To get started you will need a photo of any kind. For our purposes, I will be using a questionable photo of Obama.
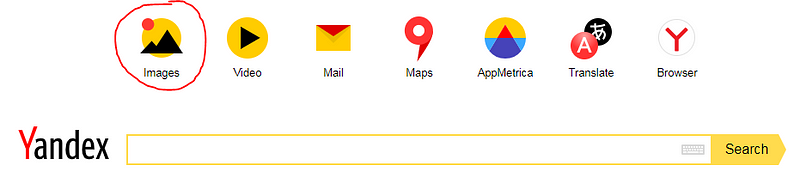
Take your photo and head over to Google, Bing, or Yandex. If you haven’t heard of Yandex, it is a fantastic search engine for images within other countries. For this demo, I will be using Yandex.
From the Yandex homepage, you will need to select Images and then the camera icon to locate your saved photo on your computer or you can paste a url.


After scrolling through the list of images we come across the original image which shows us the first image was digitally altered. Unfortunately, sometimes you will have to scroll through a bunch of images before you find what you are looking for.
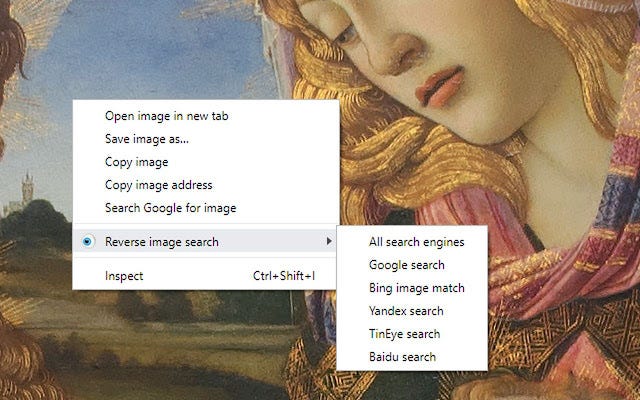
Luckily some useful free tools exist to make reverse image searching easier. RevEye is a Chrome plugin that searches Bing, Google, Yandex, TinEye, and Baidu. With RevEye you can just right-click on an image and go straight to the appropriate search engine in the list.
2. Forensically
Forensically is a free web-based digital forensic tool that can be used to detect cloning, error level analysis, image metadata, and more. Error level analysis or ELA is used to identify the different levels of compression artifacts in a jpg image. The more a jpg image is saved, the more it compresses so when it is analyzed, the edited sections of the image become less uniform and thus more apparent. Error level analysis is often considered subjective by many but it may help you to identify otherwise unseen edits within an image.
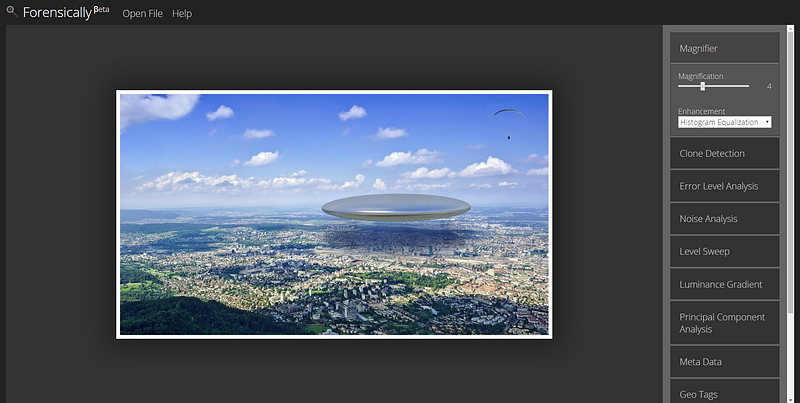
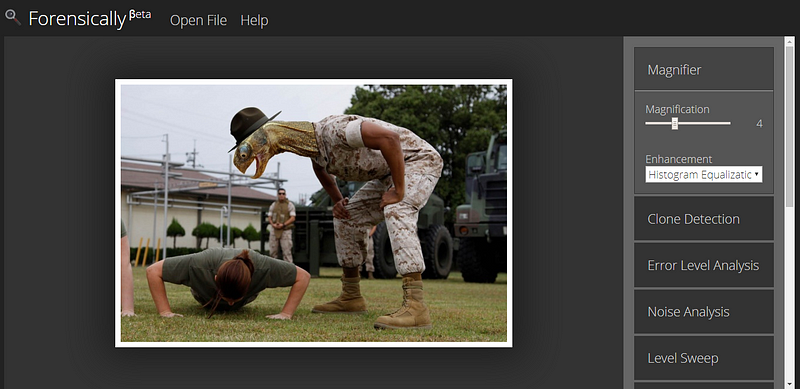
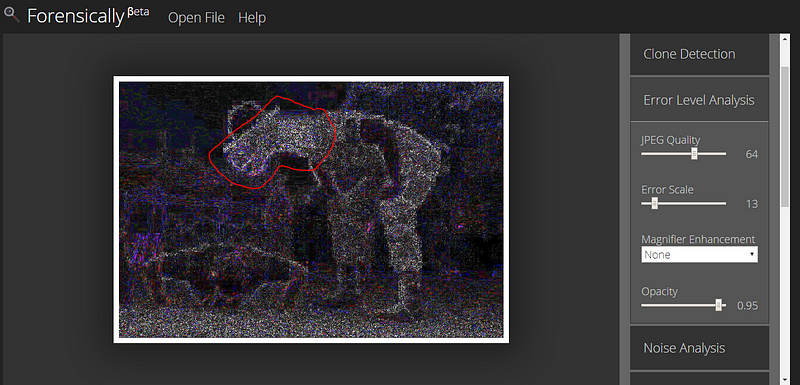
In this image below of a turtle-headed man, it should be very obvious to you what part was edited. Let’s check it out anyway just to be sure..
If we click on the Error Level Analysis button on the right and adjust the sliders, we can quickly see the turtle head stands out as brighter and less uniform than the rest of the body and the background. With ELA all high contrast and low contrast edges should look similar. If there are huge differences than you can suspect an image was altered.
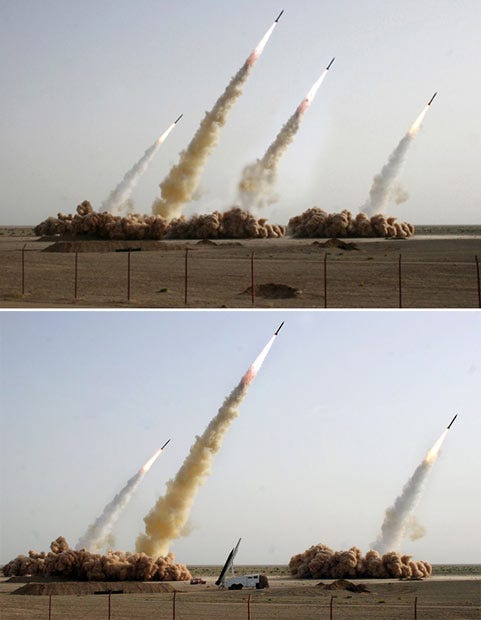
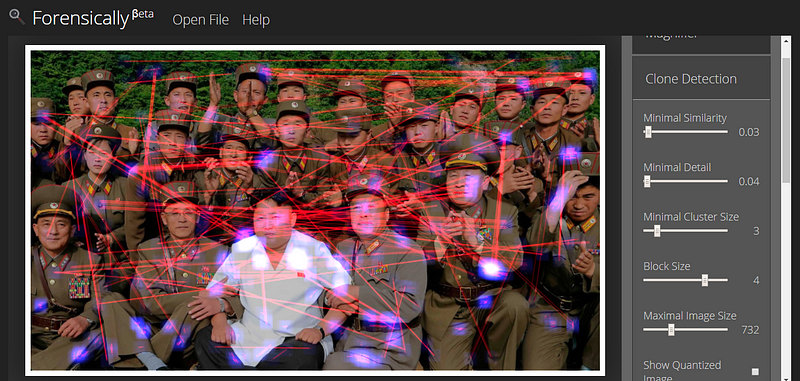
Another tool available in Forensically is the Clone Detection Tool. With this tool, it is possible to see all of the locations where an image has been cloned. The accuracy of this tool depends a lot on the position of the sliders and the quality of the original image. For example, not all of the spots highlighted in the below image are cloned, but if you play around with the slider position you can better target the actual edits.
One can easily see how Forensically could add some value to an investigation. Make sure to check out the other tools within the program like the metadata analysis.
3. EXIF/Metadata
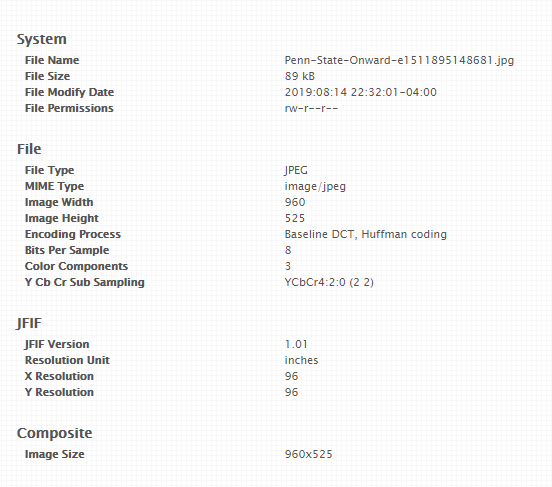
EXIF stands for Exchangeable Image File and it is used to store information in digital photography that uses JPG compression. The information contained in EXIF files includes camera info like F stop, flash, ISO number, exposure, shutter speed, lenses, resolution, white balance, and GPS coordinates. This type of data can be used for all sorts of OSINT reasons. Perhaps you want to know the camera type so you can hack into it or maybe you want the GPS coordinates of a photograph to track someone’s location. Many tools exist to view EXIF data, including just right-clicking on an image and going to details. However, I am going to demo the site ExifData.com because I think it provides a bit more useful information.
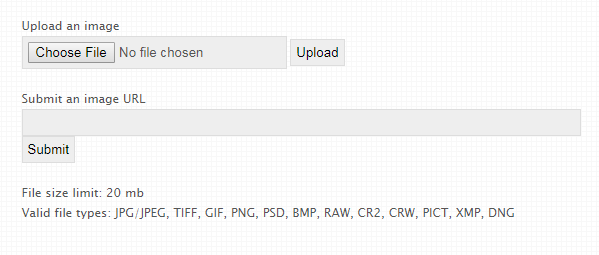
When you go to ExifData.com you will need to either upload an image from your computer or submit a url.
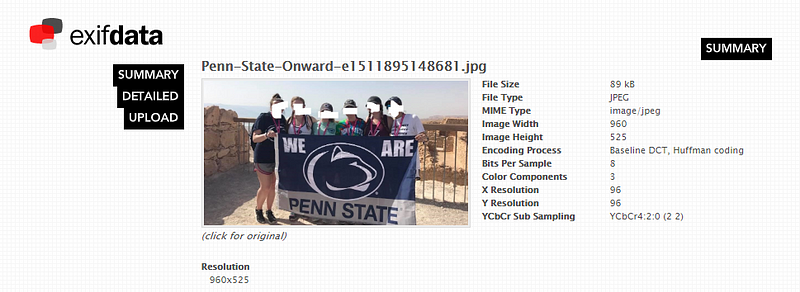
Once the picture is loaded into the site you can see a summary of details to the right of the image. The “Detailed” button on the left will provide you with a few more details like file permissions, size, GPS coordinates if available, etc.
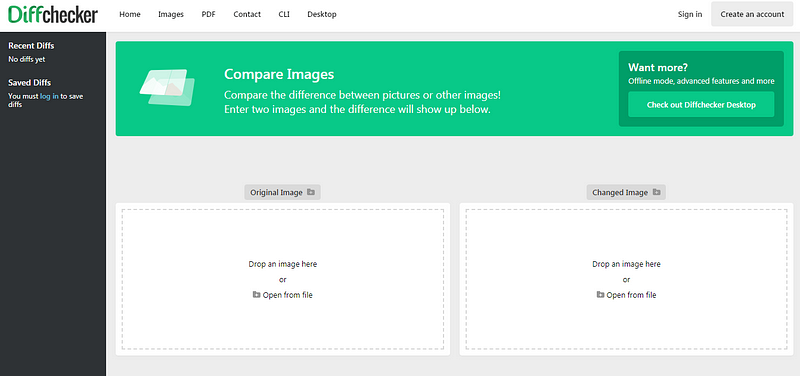
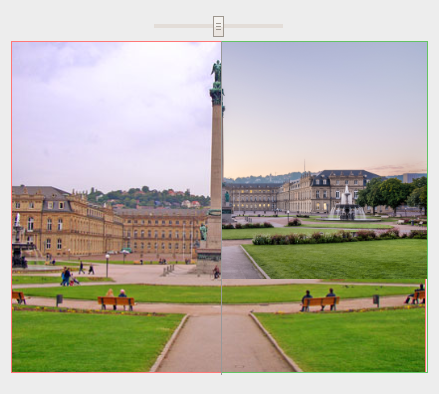
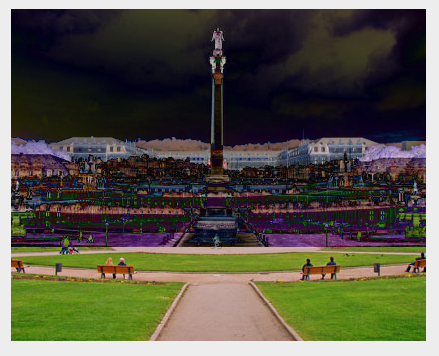
4. Diff Checker
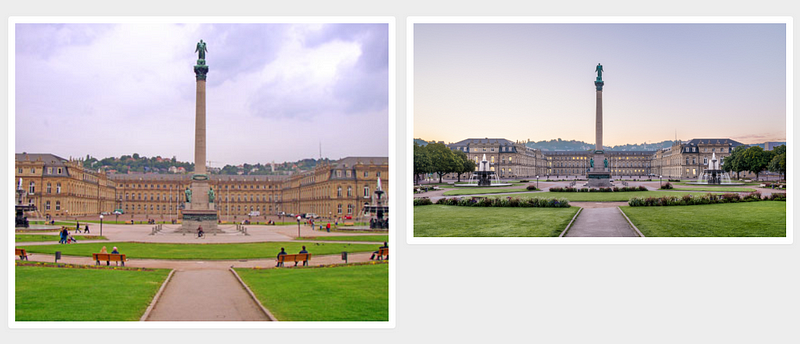
Diff Checker is an interesting tool that allows you to compare two photos either side by side or overlaid to see the differences between them. This tool would be useful in catching small changes to an image.
On the homepage of Diff Checker, you will need to upload two images to compare
The first option for viewing changes is Fade. Fade places one image on top of the other and lets you toggle the opacity to see changes between the images.
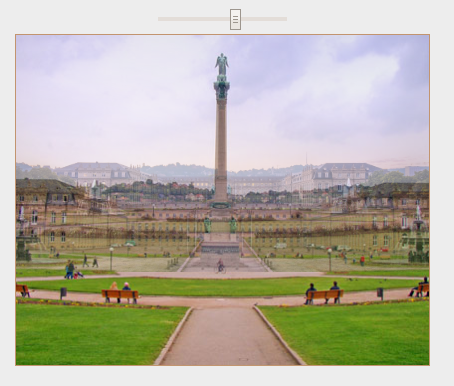
The Slider option also places the images together but allows you to slide back and forth to compare one side against the other.
The Difference option places both images together and inverts the colors so you can see the differences between both photos. Sometimes using the difference feature allows you to catch minor edits you wouldn’t normally see.
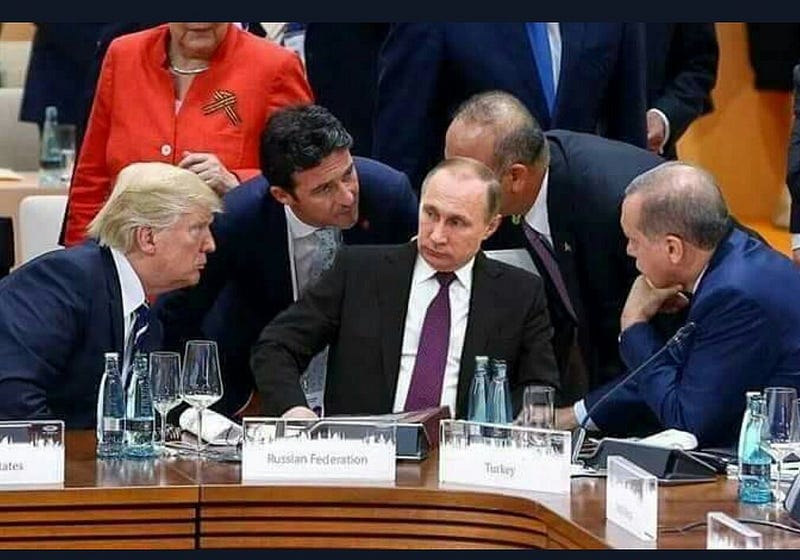
5. Your Eyes
There are many subtle (and not so subtle) clues that an image has been digitally altered. Many of the alterations you can see without using any special tools at all. This image below is a well-known hoax image that made the rounds in 2017.
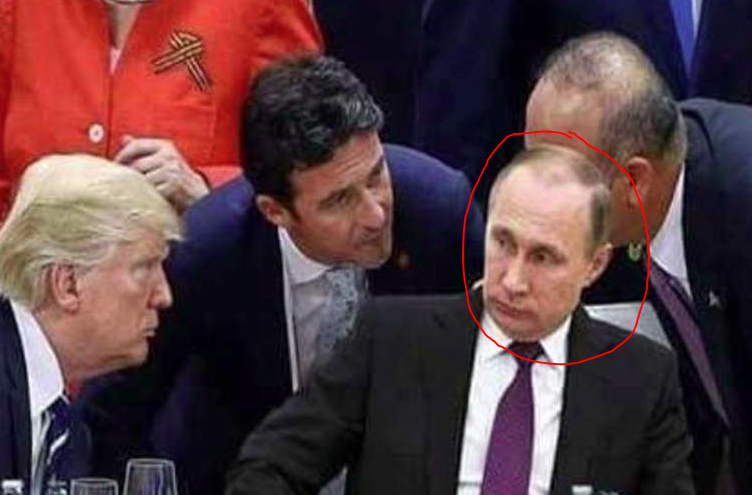
If you look closely there are some very obvious signs that this image has been altered. We can see upon zooming in that the contrast on Putin’s face is much harsher than the rest of the group and the shadows are not right. Also when zoomed out you can see a visible difference in the silhouette of his body compared to those surrounding him.
Here is another example of contrast, texture differences, and unmatching shadows giving away the authenticity of a photo.
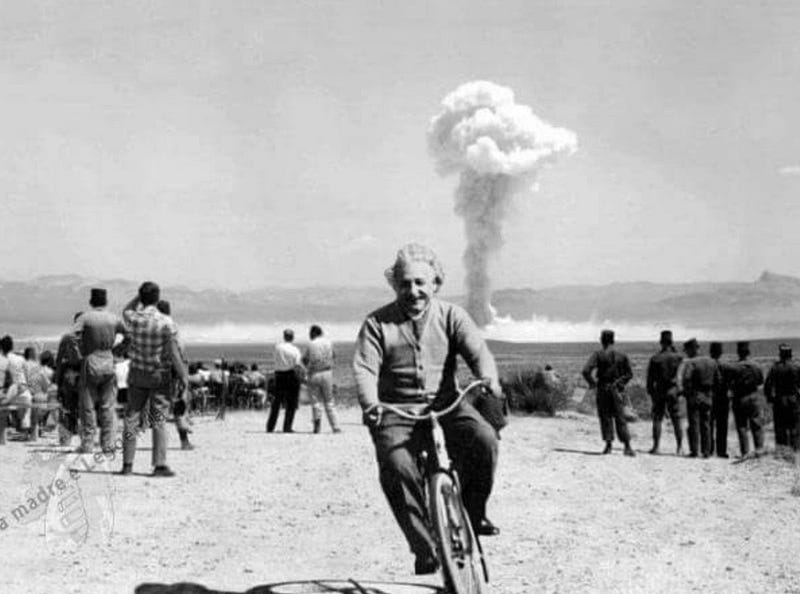
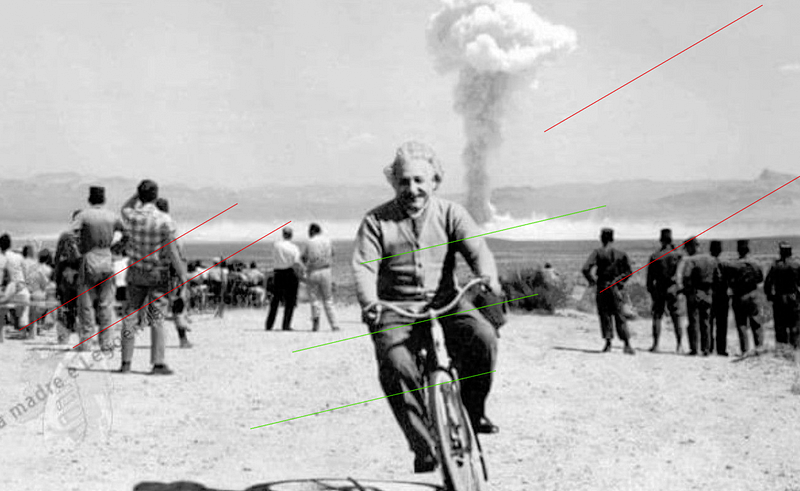
You can see how the shadows of all the people do not match the direction of the shadow on Einstein. In addition, the contrast and texturizing are different between Einstein and the other men and the edges of his hair are not well blended.
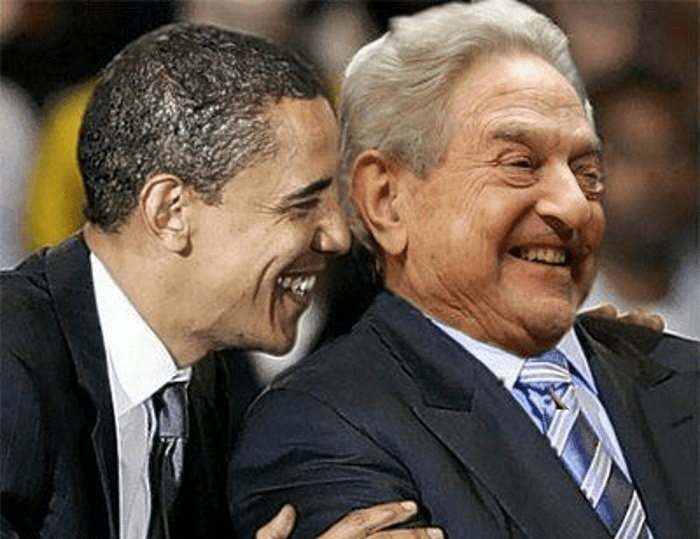
In the end, there are a ton of useful tools that can assist with analyzing digital photos for validation. I suggest trying a few out and seeing which work the best for your specific situation. Personally, I use Start.me with the Verification Toolset which provides a whole host of verification tools you can test out. The takeaway here is that you don’t necessarily need fancy tools to analyze digital photos, many are free, easy to use, and readily available!
If you liked this blog, check out my Beginner’s Guide to OSINT Investigation with Maltego.